In this step you will learn how to use the keyboard to quickly drawing a polyline and then create some fillets and chamfers. 1.You only need the Top View 2.Alternately you can right-click on the Top View tab and select Single Viewport. 3.If you do not see the Top View
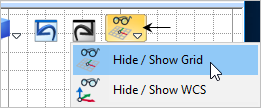
4.For visual purposes, we are displaying the construction Grid and the Grid options are set to those in the Preferences Exercise. 5.If the Grid is not displayed you can toggle it on by selecting Hide / Show Grid from the View Toolbar.
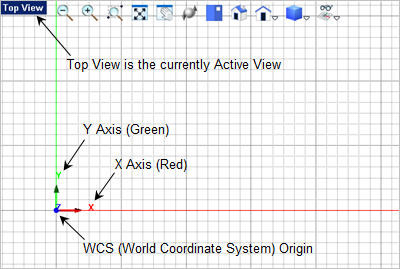
6.Scroll the middle mouse button to zoom in/out so that you see the World Origin WCS triad toward the bottom left of the screen. If you do not see the X (Red) and Y (Green) axes displayed, make sure you are in the Top View.
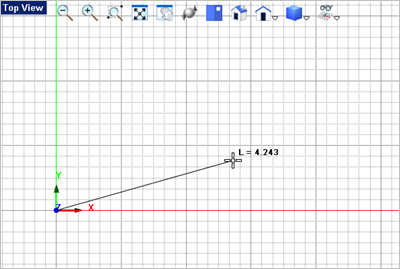
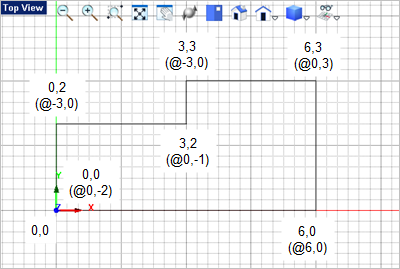
7.Now we can start curve drawing. From the Curve Modeling 8.The command prompt says:
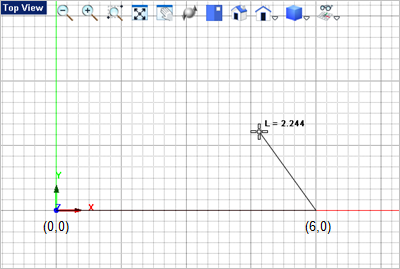
9.For the next point in the Polyline, enter 6,0
10.Now if you are drawing and you do not know the exact absolute coordinate values you can enter Relative Coordinate values in the command window.
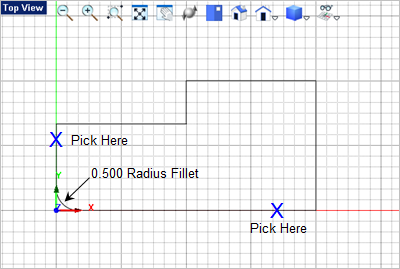
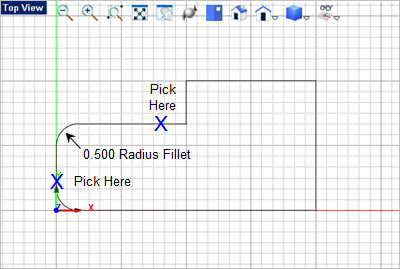
Note: In the future you can also specify a point at an angle and length from the previous point using the following format: @6<45 where the length of the line segment is 6 and the direction is 45 degrees from the previous point. 11.Always Save your work! Select the Save 12.Now let's add some fillets. From the Curve Modeling 13.For the fillet radius, enter 0.5 in the command window and press <Enter>. 14.For the two lines to fillet, select the lines marked in the illustration below. For filleting it is best to select the line on the end furthest from the end you want to fillet.
15.Press <Enter> to repeat the Fillet 16.The default fillet radius is now 0.5 so proceed directly to picking the two lines to fillet and press <Enter>.
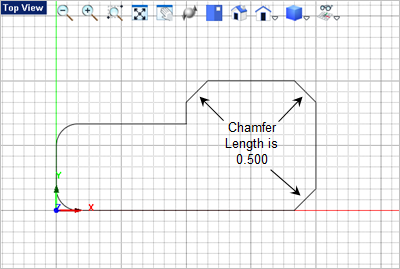
17.Next we will chamfer the three remaining outer corners. From the Curve Modeling 18.For the chamfer length, enter 0.5 in the command window 19.For the lines to chamfer, select lines marked in the illustration below. For chamfers it is best to select the line on the end furthest from the end you want to chamfer.
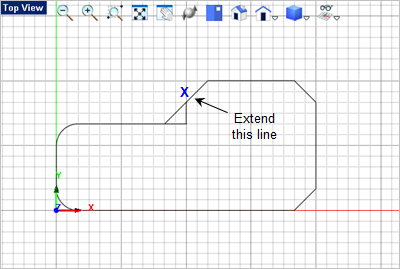
20.Currently our curves are still are one polyline. For this next step we need to explode the polyline. From the Curve Modeling 21.Select the polyline and the right-click the mouse or press <Enter>. The polyline is now individual curves. 22.Now from the Curve Modeling 23.Select the change line marked below to extend it to the horizontal line.
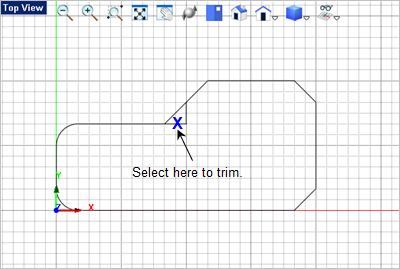
24.Now from the Curve Modeling 25.Pick the line segment to trim. When using the Trim command, you do not need to select the trimming curve. Just select what curve you want trimmed.
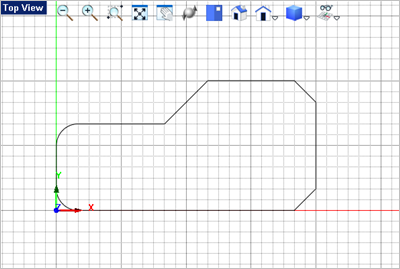
26.Next, delete the unneeded line. Just select it and then press the <Del> key or select the Cut
|