Once machining operations are created they can be post-processed to a specific machine controller. To post-process a machining operation, select the operation in the browser, right click and select Post. The product comes with a set of over 300 post-processors to choose from. The current post-processor and g-code is also stored with the Part file. The current post-processor and latest G-Code is stored with the part file for better CAM Life-cycle Management.
When you set the current post-processor for your Machining Job it is saved with your part file when the file is saved. This keeps the post-processor used to generate your g-code associated with your part file for better CAM Life-cycle Management.  The Current Post-Processor is stored with your Part File |
When you post-process a machining operation from the Machining Job, the G-Code data is also saved with your part file when the file is saved. This keeps all cam data together for better CAM Life-cycle Management. If you see that the G-Code icon is flagged, it means that the latest G-Code has not been captured. Regenerate the operation and the flag will be removed.  The G-Code Item within the MOp Folder |
You can view or edit your G-Code from an operation that you have generated by simply clicking on the G-Code icon within the mop folder. G-Code Browser: Tool Crib menu item The Machining Browser will be replaced with the Edit tab of the G-Code Editor module. To return to the MILL module pick the left arrow icon at the top of the G-Code Editor browser. For documentation on using the G-Code Editor Edit tab click on the "?" help icon located at the top right side of the G-Code Editor browser. G-Code Browser: Tool Crib menu item |
1.Create and adjust the toolpath operations that you want to post G-Code for. 2.Make sure the toolpaths have generated cleanly. Each toolpath when generated is listed under a Setup in the Machining Job. If the operation is flagged it means that it needs to be regenerated.
3.
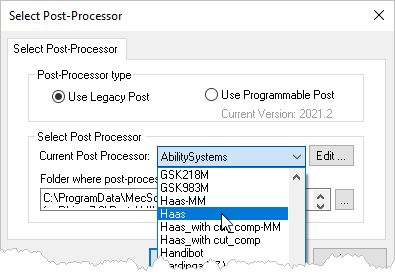
4.Select a Post from the Current Post Processor selection menu. See How to Define the Post-Processor for more information.
5.Make sure you have simulated each toolpath and are satisfied with each toolpath operation. See How to Simulate a Toolpath for more information. 6.Select the operation that you want to post. You can select multiple operations by pressing the <Ctrl> key while selecting. You can also select an entire Setup or the entire Machining Job.
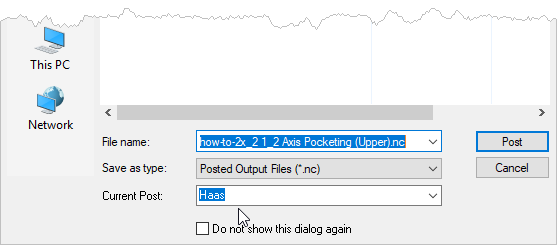
7.Right-click on the selected operation(s) and select Post to display the dialog.
8.Your Current Post is listed at the bottom of the dialog. You can change it here if desired.
9.Navigate to the folder where you want the posted G-Code file to be saved. 10.Adjust the name of the G-Code file if desired. 11.Make sure the file extension (example: .nc) of the G-Code file is correct and that your CNC machine controller will read this file extension. Refer to your controller manual for this information. 12.Select the Post button and the G-Code file is calculated and displayed.
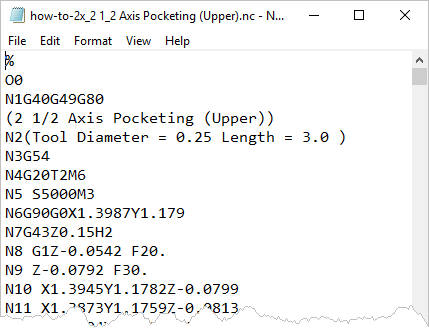
13.G-Code files are ASCII Text Files and by default, are displayed in notepad, a windows generic text editor. 14.You can review the G-Code and make any manual edits if needed and save the file from notepad. 15.If you use a different text and G-Code editor program, you can tell VisualCAM to display your G-Code files in this program. To do this select Post from the Program tab to display the dialog. 16.
17.Locate the .exe program that you use to edit your G-Code files with and then press Open. 18.Then pick OK to close the Set Post-Processor Options dialog. |